
How to Sew a Half Apron: Complete Beginner Guide
Table of Contents
- What Is a Half Apron and Why Make One?
- Half Apron vs Full Apron: Key Differences
- Materials, Fabric, and Notions You'll Need
- Half Apron Sewing Pattern with Measurements
- Step-by-Step: How to Sew a Half Apron
- Designing a Pocketed Waist Apron
- Common Mistakes to Avoid
- Care, Durability, and Repair
- Frequently Asked Questions
Last Updated: October 14, 2026
What Is a Half Apron and Why Make One?
A half apron is a waist apron covering only the front of your body, typically from waist to knee or mid-calf, leaving your back and sides exposed.
Making your own half apron gives you complete control over fit, fabric, and design, length, pocket placement, and waistband style, so you get something that fits your body and reflects your taste.
Cost is another reason: a handmade half apron costs a fraction of a quality retail version, and you control every material choice.
Half Apron vs Full Apron: Key Differences
The main difference is coverage. A full apron wraps around your entire body, protecting your front, sides, and sometimes your back; a half apron covers only the front.
Half aprons are better for:
- Quick tasks (grabbing a hot bowl from the microwave, wiping hands fast)
- Warm kitchens (less fabric means better airflow)
- Hospitality settings (servers need to move freely between tables)
- Home cooks who want style without bulk
- Gardening (easier to kneel and bend)
Full aprons work better for:
- Messy projects (painting, heavy cooking, canning)
- Extended wear (all-day protection)
- Tasks where you need maximum coverage
For most home cooks, a half apron strikes the right balance: it protects your clothes without weighing you down, and the front pockets hold small tools or cloths within reach.
Materials, Fabric, and Notions You'll Need
Start with fabric. Cotton is the standard choice, breathable, durable, and washable. Look for medium-weight cotton: 100% cotton quilting fabric, linen-cotton blends, or home décor cotton. Avoid thin cotton that tears easily or heavy canvas that's stiff to sew.
Fabric amount: You'll need roughly 0.5 to 0.75 metres of fabric, depending on your desired length and pocket size.
Notions and supplies you'll need:
- Matching thread (all-purpose polyester or cotton)
- Elastic or bias tape for the waistband (optional, ties work just as well)
- Scissors or rotary cutter
- Measuring tape
- Pins or pattern weights
Half Apron Sewing Pattern with Measurements
Here's a basic pattern that works for most body types, creating a finished half apron approximately 45 centimetres wide and 60 centimetres long.
Pattern pieces:
- Main apron body: 48 centimetres wide × 63 centimetres long (includes seam allowance)
- Waistband: 5 centimetres wide × your waist measurement plus 30 centimetres (for ties)
- Two front pockets (optional): 18 centimetres wide × 20 centimetres tall
Seam allowance: Add 1.3 centimetres on all edges for standard seam allowance.
Sizing for Different Body Types
The pattern above is a starting point; the key measurements to adjust are width and length.
For petite frames: Reduce the main body to 40 centimetres wide and 50 centimetres long.
For larger frames: Increase width to 55 centimetres and length to 70 centimetres.
Length considerations: Measure from your natural waist to where you want the apron to end, most people prefer mid-thigh or just below the knee.
The waist measurement should sit at your natural waist, not your hips.
Step-by-Step: How to Sew a Half Apron
Cutting and Preparing Your Fabric
Lay your fabric flat and mark your pattern pieces with a measuring tape and fabric marker: the main apron body as a 48 × 63 centimetre rectangle, plus pockets and waistband separately.
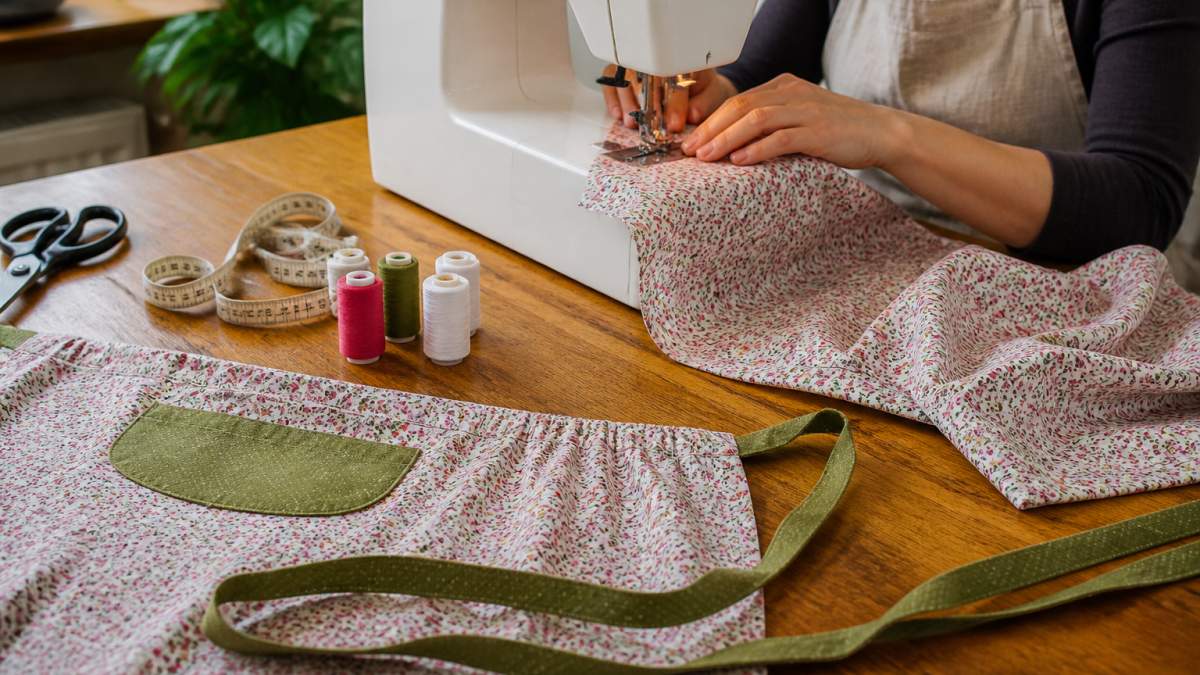
Cut slowly with sharp scissors or a rotary cutter, dull blades create jagged edges that are harder to finish neatly.
Once cut, press all pieces with a hot iron: flat fabric feeds smoothly through your machine.
Hemming and Finishing Edges
Hemming creates a professional finish and prevents fraying. Hem three sides, both long sides and the bottom, but not the top edge, which attaches to the waistband.
Fold the first long edge inward by 1.3 centimetres, press, then fold again by another 1.3 centimetres to create a double-fold hem.
A double-fold hem is stronger than a single fold and looks clean on both sides. For a faster method, use pre-folded bias tape instead.
Adding Waist Ties and Waistband
The waistband holds everything together.
Fold each tie in half lengthwise, right sides together, stitch along the long edge, turn right-side out, and press flat.
Fold the main waistband piece in half lengthwise.
Stitch the waistband to the top of the apron body, catching the ties in the seam. Use a straight stitch and backstitch at the start and end to reinforce.
Designing a Pocketed Waist Apron
Pockets are the difference between an apron you wear and an apron you rely on. A server needs a pocket that holds an order pad and pen without sagging; a gardener needs a deep pocket for gloves plus a small one for seeds; a cook needs a towel loop and a pocket that doesn't collect flour. The design below covers all three, plus reinforcement that keeps corners from tearing.
Pocket Sizes by Task
Cut pockets to the task, not to a single template. These are finished sizes; add 1.3 centimetres seam allowance on all sides and 2.6 centimetres on the top edge for the hem.
- Server pocket: 15 centimetres wide × 18 centimetres tall. Holds an order pad, a pen, and a folded cloth. Add a 2-centimetre pen slot stitched down the center.
- Cook pocket: 20 centimetres wide × 22 centimetres tall. Deep enough for a thermometer, a phone, or a folded towel. Split into two compartments with a vertical stitch line.
- Gardener pocket: 22 centimetres wide × 25 centimetres tall. Wide enough for gloves and a hand trowel. Add a small 8-centimetre × 8-centimetre seed pocket on top of the main pocket.
- Utility pocket: 12 centimetres wide × 14 centimetres tall. Good for keys, a small notebook, or a phone when you want it close to the hip.
Placement That Actually Works
Pocket placement is a fit decision, not decoration: the wrong height means bending to reach it, and the wrong width pulls the apron out of shape.
- Horizontal placement: center each pocket 8 to 12 centimetres in from the side edge of the apron body. For a single large pocket, center it on the apron body.
- Vertical placement: the top of the pocket should sit 8 to 12 centimetres below the waistband seam. Higher than that and the pocket fights the waistband; lower and you have to reach.
- Reach test: pin the pocket in place, put the apron on, and reach for it. If you have to bend your wrist awkwardly, move the pocket up or outward.
- Left-handed wearers: mirror the placement so the dominant hand reaches the pocket without crossing the body.
Dividers and Pen Slots
A single wide pocket becomes a junk drawer. Dividers turn it into a tool organizer.
- Pen slot: stitch a vertical line 3 centimetres in from one side of the pocket, from the top hem down to 2 centimetres above the bottom. This creates a narrow slot that holds a pen upright.
- Two-compartment pocket: stitch a vertical line down the center of the pocket, stopping 2 centimetres above the bottom so small items can still slide across.
- Phone pocket: a dedicated 9-centimetre × 15-centimetre pocket stitched on top of a larger pocket keeps a phone upright and separate from crumbs.
- Towel loop: a 4-centimetre-wide strip of fabric folded and stitched into the side seam of the apron body, 5 centimetres below the waistband. Loop a kitchen towel through it.
Reinforcement That Prevents Tearing
Pocket corners take the most stress and tear within months of daily use without reinforcement. Three methods work well:
- Bar tacks: at each top corner of the pocket, sew a short, dense zigzag stitch about 1 centimetre long. This is the fastest and strongest option.
- Triangles: stitch a small triangle at each top corner, then stitch a horizontal line across the base of the triangle. This is the traditional method and looks intentional.
- Rivets or buttons: a small button or rivet at each top corner adds mechanical strength and a decorative touch. Use this on heavier fabrics like canvas or denim.
For the pocket bottom, backstitch at both seam ends and press the seam allowance toward the apron body.
Pocket Fabric and Lining Choices
Pocket fabric takes more wear than the apron body, so choose accordingly.
- Same fabric as the apron: the cleanest look, but thin cotton pockets wear through faster.
- Contrasting medium-weight cotton: adds visual interest and durability. A darker print hides stains better than a light one.
- Lined pockets: cut two pocket pieces, sew right sides together leaving a gap, turn, and press. This doubles the durability and hides raw seams.
- Water-resistant lining: for gardening or messy cooking, line the pocket with a coated cotton or oilcloth so it wipes clean.
Do not skip the top hem on a pocket. A raw top edge frays quickly and the pocket loses its shape. Fold the top edge down 1.3 centimetres, press, fold again, and stitch before you attach the pocket to the apron.
Sew a test pocket on scrap fabric before you commit to your apron. It takes five minutes and tells you whether your stitch length, tension, and reinforcement method are working.
Common Mistakes to Avoid
Making the waist ties too short. Ties that don't wrap around with enough overlap won't tie securely.
Uneven seams. Use your machine's seam guide or mark a line with tape to keep stitches straight.
Forgetting to backstitch. Backstitching at the start and end of every seam locks the thread so it won't unravel.
Using fabric that's too thin. Lightweight fabric tears easily and looks cheap. Choose medium-weight cotton that has some body.
Care, Durability, and Repair
Your handmade half apron will last years with basic care.
If a seam starts to come loose, restitch it immediately, a small repair now prevents a bigger tear later.
Fabric may fade slightly in direct sunlight, normal, and it adds character.
Creating your own half apron gives you a piece that fits your body, matches your style, and costs far less than store-bought alternatives.
If you're looking for handmade aprons that combine function and design without the sewing, check out artisan apron makers who focus on quality construction and durability. Many creators offer custom sizing and unique fabrics you can't find elsewhere.
Frequently Asked Questions
What is a half apron called?
A half apron is commonly known as a waist apron or bistro apron. The term 'half apron' refers to its coverage, which extends from the waist down to roughly mid-thigh, covering only the front of your body. Hospitality staff and restaurant workers often wear waist aprons because they provide functional pockets and front coverage without the bulk of a full apron. Home cooks and gardeners also favor this style for its lightweight, minimalist design.
How long should the ties on a half apron be?
Waist ties should be long enough to wrap around your body comfortably and tie securely at the back. A standard length is 60-75 centimeters per tie, though this depends on your waist measurement. To determine the right length for your fit, measure from one side of your waist around to the back, then add 15-20 centimeters for tying. Double-wrap ties are popular because they offer adjustability and a secure fit. Always test the tie length before hemming the finished apron.
What fabric is best for a half apron?
Cotton and linen are the most durable choices for a half apron. Cotton is breathable, easy to sew, and holds up well to frequent washing. Linen offers a more polished, bistro-style appearance and is exceptionally durable for long-term use. Blended fabrics combining cotton and polyester add wrinkle resistance. For comfort during extended wear, choose a medium-weight fabric (around 150-200 grams per square meter). Avoid thin, flimsy materials that won't provide adequate coverage or withstand repeated use.
How do you add pockets to a half apron?
Cut pocket pieces from your main fabric or a contrasting material, typically 15-20 centimeters wide and 20-25 centimeters tall. Press the top edge under 1 centimeter and stitch it down for a finished look. Pin the pockets to the front of your apron, positioning them roughly 10-15 centimeters from the side seams and 15 centimeters down from the waistband. Stitch around three sides, leaving the top open. Reinforce the top corners with a small triangle stitch to prevent tearing under weight. This pocket design is functional and adds visual interest to your pocketed waist apron.